
A simple Node.js API built using Restify that handles and responds to all of the SCIM requests made by OneLogin for user provisioning.
The sample is based on the OneLogin Core User Schema but could be easily adapted to support the Enterprise schema.
The endpoints are configured in the root index.js file and each has a corresponding handler which is found in the handlers directory.
// Users
server.get('/Users', handlers.users.list)
server.get('/Users/:id', handlers.users.get)
server.post('/Users', handlers.users.create)
server.put('/Users/:id', handlers.users.update)
server.del('/Users/:id', handlers.users.delete)

// Groups
server.get('/Groups', handlers.groups.list)
server.post('/Groups', handlers.groups.create)
server.patch('/Groups/:id', handlers.groups.update)When you run this sample it will create a temp-db.json file in the root of the project that contains users and groups. As you run the provisioning tasks in OneLogin this db will be updated.
{
  "users": [
    {
      "id": "BJCIMyvcG",
      "username": "kelly",
      "givenName": "Kelly",
      "familyName": "Slater",
      "createdAt": "2018-03-26T21:12:53.794Z",
      "active": true
    }
  ],
  "groups": [
    {
      "id": "SJofhyDqG",
      "name": "Admin Role",
      "members": [
        "BJefgbP9G"
      ],
      "createdAt": "2018-03-26T21:54:26.811Z"
    }
  ]
}
This file based db is powered using LowDB and is not intended for production use. It is simply for this example.
It is expected that you would replace the calls to this db with your own database or api calls.
This sample shamelessly uses console.log all over the place as a simple way to display whats going on as the endpoints are hit. It is expected that you will replace this with your favorite logging solution.
You can run this locally and watch the terminal as OneLogin sends provisioning requests.
From your terminal
git clone https://github.com/onelogin/onelogin-scim-node.git
cd onelogin-scim-node && npm installThe OneLogin SCIM implementation uses a bearer token supplied in an authorization header of each request. This api will validate the token matches before allowing any provisioning tasks to take place.
Rename .env.sample to .env and replace your-bearer-token with a random string that will represent your bearer token.
You will need to enter the same token into the SCIM Bearer Token field when setting up your SCIM app via the OneLogin portal.
This will start the SCIM API on http://localhost:8080
npm startTo run this sample end to end with OneLogin it needs to be exposed to the internet so that OneLogin can make provisioning requests to the various endpoints.
For this we recommend using ngrok.
In a new terminal window download ngrok
npm install -g ngrokThen create a new HTTP tunnel using ngrok and point it at your SCIM API
ngrok http 8080Ngrok will create an HTTPS url that you will need to copy and use when setting up your SCIM app in OneLogin.
Note that this HTTPS url will change every time you run this command. You will need to update the SCIM Base URL in your app accordingly.
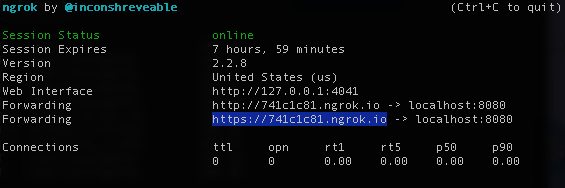
If you already have a SCIM app configured then simply paste the ngrok url in the SCIM Base URL field on the Configuration tab of your app.
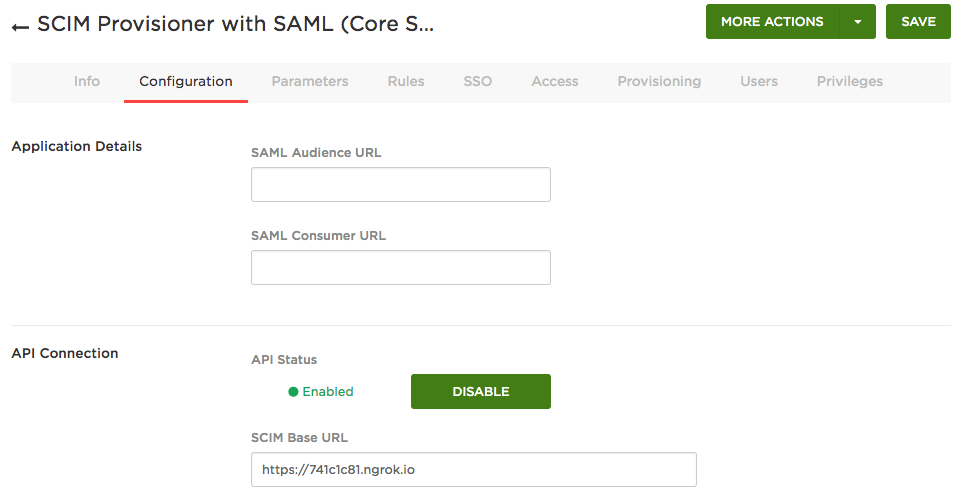
If you don't have a SCIM app conifured yet then follow this guide to create an app using the SCIM Provisioner with SAML (Core Schema v1.1).
Follow this guide to enable provisioning and test your SCIM API.